
Learn how to roast garlic with a simple and easy step by step tutorial and also how to store roasted garlic and how to use it.
If you're a garlic lover, you NEED to give this a try. Besides, it's a simple recipe everyone can prepare and roasted garlic will make your dishes taste even better.
From hummus to aioli to mashed potatoes, there are hundreds of recipes you can make using it, but it's also delicious spread onto warm bread, and the oil we use to store it is just perfect for grilling!
In addition, it only requires 3 easy-to-get ingredients: garlic, extra virgin olive oil, and salt, that's all!
How to make roasted garlic - Step by step

- Preheat the oven to 400ºF (200ºC) and set a rack in the middle position. Roast as many heads of garlic as you want. I used 3 (photo 1).
- Cut about ¼ inch (0.5 cm) off the top of each head of garlic to expose the tops of the garlic cloves (photo 2).
- Drizzle with some extra virgin olive oil. I added 1 teaspoon of oil per head of garlic (photo 3).
- Add some salt to taste (photo 4). This step is optional.
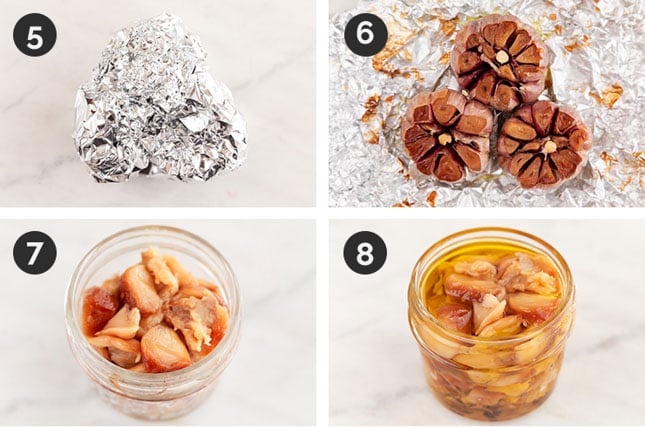
- Wrap the heads of garlic in aluminum foil (photo 5).
- Roast in the oven for 45 to 60 minutes (photo 6). After 45 minutes, begin checking the garlic. The garlic is done when the center of each clove is completely soft. Once the garlic is soft, bake until deeply golden brown to get a camaralized flavor. Check it every 10 minutes or so. My garlic was ready in 60 minutes, but every oven and every type of garlic is different (it may vary depending on the size, the variety, and its age).
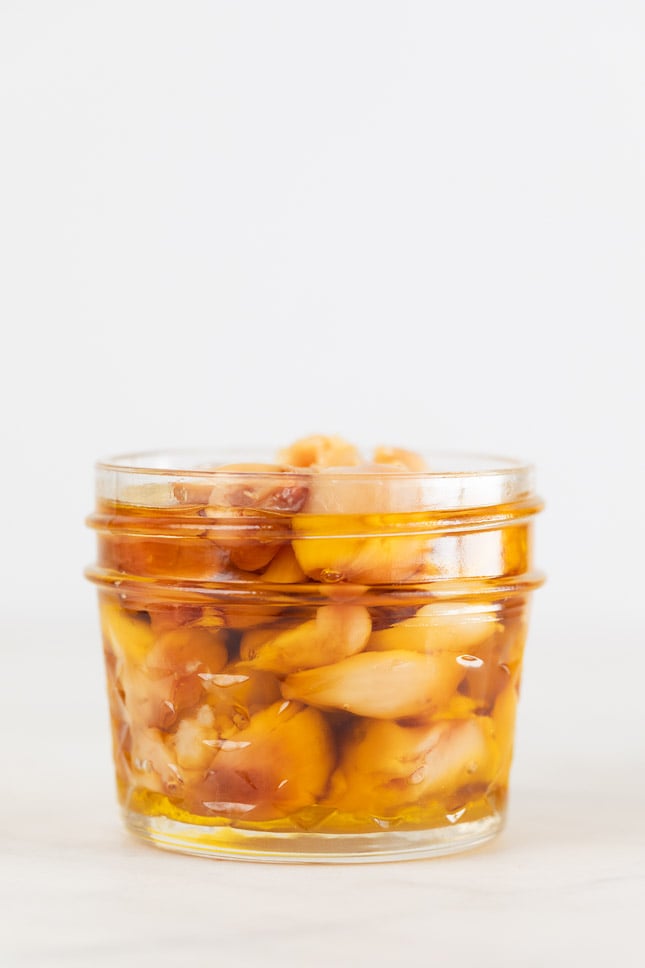
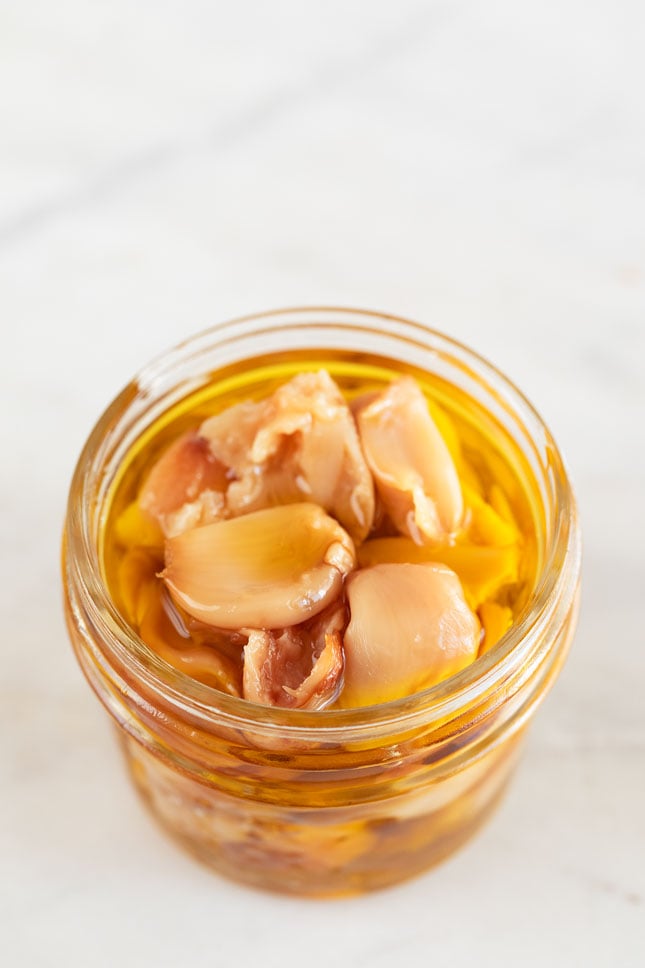
- Allow the garlic to cool a little bit so you can touch it without burning yourself. Use your fingers or a fork to pull or squeeze the roasted garlic cloves out of their skins and transfer to a small glass jar (photo 7).
- Top with extra virgin olive oil to cover (photo 8) and keep in the fridge for up to 2 weeks.
Pro tips
- You can peel most of the paper off the garlic, but it's up to you. I've tried both methods and it's pretty much the same, so do what you want.
- If you want to peel it, use your fingers to peel away all the loose, outer layers around the head of garlic, but leave all the cloves connected.
- If you don't want to use aluminum foil, you can take the head of garlic and separate it into cloves. Leave the skin on, place the cloves onto a baking sheet, add some oil and salt and bake for 20-30 minutes or until soft and golden brown.
- Salt is optional, but I think roasted garlic tastes better when you add a little bit of salt.
- Any type of oil will do, but extra virgin olive oil is my favorite one. You don't have to store the garlic in oil. However, it will last much longer that way.
- Feel free to add some ground black pepper as well.
How to store roasted garlic
- You can store it in the fridge in an airtight container (I used a small glass jar) covered with oil, for about 2 weeks.
- If you want to keep it longer, just freezer. First, let the garlic cool after roasting it and remove any papery skins.
- Then mash the roasted garlic and freeze it in an ice cube tray. Once frozen, pop out the cubes and keep them in a sealed plastic bag or an airtight container in the freezer.
- If you prefer to freeze whole cloves, spread them out onto a baking sheet and place it in the freezer. Once frozen, store the cloves in a sealed plastic bag or an airtight container.
What to do with roasted garlic?
- Spread the garlic onto pieces of sliced baguette or any other type of bread you have on hand.
- Add 1 or 2 cloves to your homemade or store-bought mayonnaise, blend until smooth and get a quick and easy roasted garlic aioli in less than a minute.
- You can also add it to any other sauce or salad dressing if you're a garlic lover like me. It's also delicious in hummus.
- Mash the roasted garlic and spread it over a baked potato in place of butter. It's extremely delicious, healthier and low in fat.
- Use it to make vegan mashed potatoes.
- The oil is great for grilling, but feel free to use it to make salads or any other recipes you want.
Looking for more how-tos?
Did you make this roasted garlic recipe?
Please leave a comment below, share it or rate it. You can also FOLLOW ME on FACEBOOK, INSTAGRAM, and PINTEREST. I’d love to see what you cook!
Roasted Garlic
Learn how to roast garlic with a simple and easy step by step tutorial and also how to store roasted garlic and how to use it.
PRINT
PIN
RATE
Servings: heads of garlic
Ingredients
- 3 heads of garlic
- 1 tablespoon extra virgin olive oil
- Pinch of salt, optional
Instructions
- Preheat the oven to 400ºF (200ºC) and set a rack in the middle position. Roast as many heads of garlic as you want. I used 3, though.
- Cut about ¼ inch (0.5 cm) off the top of each head of garlic to expose the tops of the garlic cloves.
- Drizzle with some extra virgin olive oil. I added 1 teaspoon of oil per head of garlic (1 tablespoon for the 3 heads of garlic), but feel free to add more or less if you want.
- Add some salt to taste. This step is optional, but I think roasted garlic tastes even better when you add a little bit of salt.
- Wrap the heads of garlic in aluminum foil (see notes if you don't want to use it).
- Roast in the oven for about 45 to 60 minutes. After 45 minutes, begin checking the garlic. The garlic is done when the center of each clove is completely soft. Once the garlic is soft, bake until deeply golden brown to get a caramelized flavor. Check the garlic every 10 minutes or so. My garlic was ready in 60 minutes, but every oven and every type of garlic is different (it may vary depending on the size of the garlic, the variety, and its age).
- Allow the garlic to cool a little bit so you can touch it without burning yourself. Use your fingers or a fork to pull or squeeze the roasted garlic cloves out of their skins and transfer to a small glass jar.
- Top with extra virgin olive oil to cover and keep in the fridge for up to 2 weeks. You can enjoy it as a spread, for adding to sauces, dressings or salads, and the oil is also amazing for grilling.
Notes
- You can peel most of the paper off the garlic, but it's optional. I've tried both methods and it's pretty much the same. If you want to peel it, use your fingers to peel away all the loose, outer layers around the head of garlic, but leave all the cloves connected.
- If you don't want to use aluminum foil, you can take the head of garlic and separate it into cloves. Leave the skin on, place the cloves onto a baking sheet, add some oil and salt and bake for 20-30 minutes or until soft and golden brown. Be careful not to burn the garlic.
- Any type of oil will do, but extra virgin olive oil is my favorite one. You don't have to store the garlic in oil. However, it will last much longer that way.
- Feel free to add also some ground black pepper.
Nutrition
Serving: 1head of garlic | Calories: 94kcal | Carbohydrates: 11.9g | Protein: 2.3g | Fat: 4.9g | Saturated Fat: 0.7g | Sodium: 57mg | Fiber: 0.8g | Sugar: 0.4g
Tried this recipe?Leave a comment below and let me know how it was!

Lizpanek says
This is a great method, but if you are planning to cook with the roasted garlic afterward (for example, I often add roasted garlic to miso soup) you should stay away from storing it in a low-heat oil like extra virgin olive oil.
Iosune Robles says
Thanks for the tip 🙂
Laura Ann Lafontsee says
Love your tips!! I use toasted garlic, 1 clove in oatmeal, with chives and tomato pesto. Great savory breakfast.
Iosune Robles says
Thanks! That sounds so good 🙂
Alexandre Freire says
Hi Iosune. Longtime fan and follower. I use the same technique to store my garlic, but I have never roasted it. Going to try the next time, though. Thank you for the awesome blog and recipes!
Iosune says
Hi Alexandre! You're so welcome 🙂 Hope you enjoy it!